Achieving a 50kg harvest in a 10m² space is an engineering problem, not a horticultural fantasy. It requires a shift from passive gardening to active yield optimization.
- Success depends on maximizing four key inputs: available light, soil volume, spatial geometry, and temporal sequencing.
- Methods like hexagonal planting and crop rotation aren’t just ‘good ideas’; they are mathematical tools that can increase plant density and soil output by over 15%.
Recommendation: Begin by mapping your garden’s daily sunlight patterns to create a “light budget.” This single data point will dictate over 70% of your potential success.
The ambition of harvesting 50 kilograms of fresh vegetables from a mere 10-square-meter plot—roughly the size of a small bedroom—seems more like a marketing claim than a realistic goal for a suburban homeowner. Most gardening advice revolves around generic tips: “use good soil,” “water regularly,” and “choose sunny spots.” While not incorrect, these platitudes fail to address the core challenge: turning a small, finite space into a highly productive food-generating system. The common approach leads to disappointing yields, pest problems, and the conclusion that food independence is a dream reserved for those with sprawling acreage.
But what if the solution wasn’t found in more space, but in a more calculated approach? The key to unlocking massive yields in a small footprint lies in treating your garden not as a collection of plants, but as an integrated system to be engineered. This involves a fundamental shift in perspective: from a gardener who plants, to an urban farming strategist who optimizes inputs. It’s about understanding the physics of light, the geometry of planting, and the dimension of time to stack functions and multiply output.
This guide will not give you vague encouragement. It will provide the calculations, strategies, and system-based thinking required to transform your 10m² patch into a predictable food production zone. We will deconstruct the process, moving from foundational soil health and light analysis to advanced spatial and temporal stacking techniques, turning the ambitious 50kg goal into an achievable, data-driven project.
Summary: A Strategic Blueprint for High-Yield Small-Space Gardening
- Why Planting Tomatoes in the Same Spot Kills Your Harvest?
- How to Map Your Garden’s Sun Patterns Before Planting?
- Raised Beds or In-Ground: Which Saves Your Back and Soil?
- The Spacing Mistake That Invites Fungus into Your Garden
- When to Plant Your Second Crop for a Fall Harvest?
- How to Cut Your Grocery Bill by 20% While Prices Rise?
- Multivitamins or Whole Foods: Which Actually Absorbs Better?
- How to Start a Permaculture Guild in Your Backyard?
Why Planting Tomatoes in the Same Spot Kills Your Harvest?
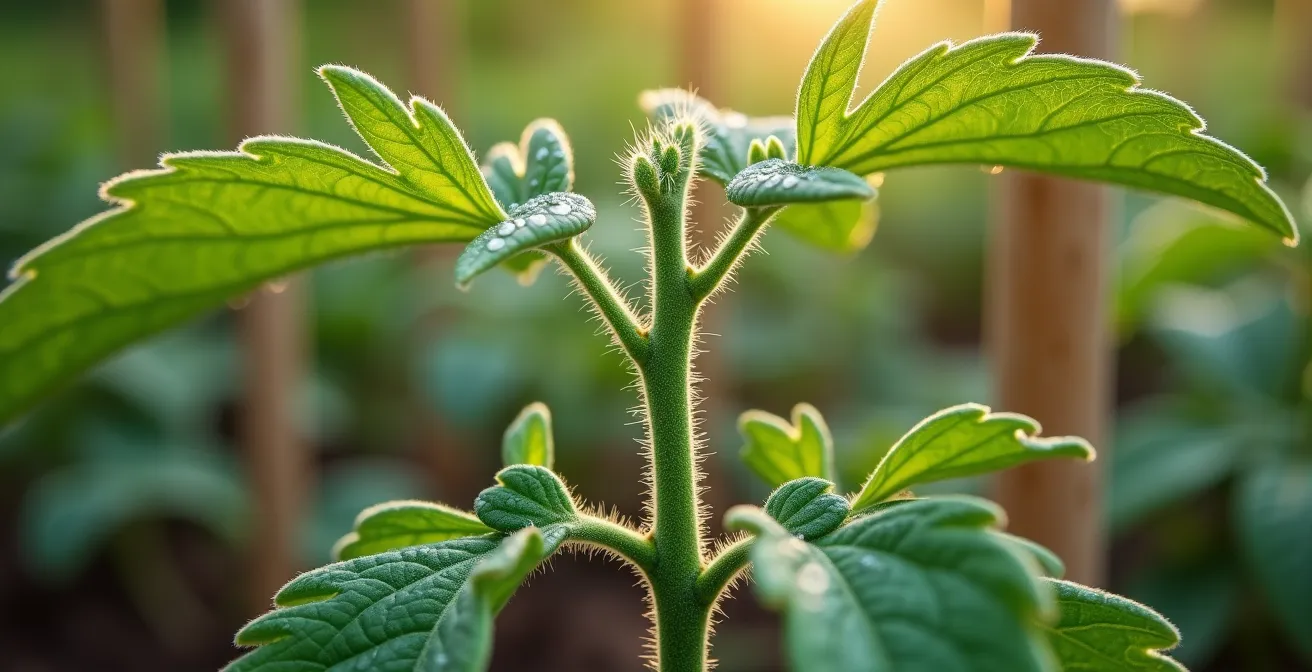
The single most common mistake that sabotages long-term yield is monoculture planting, especially with heavy-feeding crops like tomatoes. Planting the same vegetable family in the same soil year after year creates a perfect storm for failure. It systematically depletes specific nutrients and allows soil-borne diseases and pests (like Fusarium wilt and nematodes) to build up to devastating levels. This isn’t just theory; research from small-scale farming studies shows that some growers can lose over half their crop when it’s repeatedly grown in the same location. Your soil becomes an exhausted, disease-ridden medium incapable of supporting vigorous growth.
The solution is a calculated strategy of crop rotation. This isn’t a random shuffling of plants but a deliberate, multi-year plan to break pest and disease cycles while actively rebuilding soil fertility. By rotating plant families with different nutritional needs and vulnerabilities, you starve out specialized pathogens and balance nutrient withdrawal. For example, following heavy-feeding nightshades (tomatoes, peppers) with nitrogen-fixing legumes (beans, peas) actively replenishes the soil for the next cycle.
A simple yet effective system is a four-year rotation. Divide your 10m² garden into four zones (A, B, C, D). This ensures that any given soil bed gets a three-year break from a specific plant family, which is long enough to disrupt the life cycles of most persistent soil pests and diseases. This approach turns your soil from a disposable resource into a resilient, improving asset.
To implement this, follow a structured rotation plan:
- Year 1: Plant tomatoes and other nightshades in bed A.
- Year 2: Move nightshades to bed B, and plant nitrogen-fixing legumes in bed A.
- Year 3: Rotate nightshades to bed C, and grow heavy-feeding brassicas (broccoli, kale) in bed A (which is now nitrogen-rich).
- Year 4: Place nightshades in bed D, and plant light-feeding root vegetables (carrots, beets) in bed A.
- Year 5: You can now return tomatoes to bed A, which has fully recovered and been amended by three other crop types.
How to Map Your Garden’s Sun Patterns Before Planting?
The primary energy input for your garden is sunlight, yet most gardeners treat it as a simple binary: “sunny spot” or “shady spot.” This is a critical oversimplification. To maximize yield, you must think like an engineer and create a light budget for your 10m² plot. Different areas will receive varying amounts of direct sunlight throughout the day and the season, measured scientifically as the Daily Light Integral (DLI). High-yield fruiting plants like tomatoes and peppers require high DLI (6+ hours of direct sun), while leafy greens and root vegetables can thrive in medium DLI (4-6 hours).
Before planting a single seed, spend a day mapping your garden’s light. Take photos or sketch your 10m² plot at 9 a.m., 12 p.m., and 3 p.m. to identify which zones receive full sun, partial shade (dappled light), and deep shade. This simple exercise transforms your planting plan from guesswork into a strategic allocation of a finite resource. Placing a sun-hungry tomato plant in a medium-DLI zone is a recipe for a stunted plant with minimal fruit, wasting precious space and time.
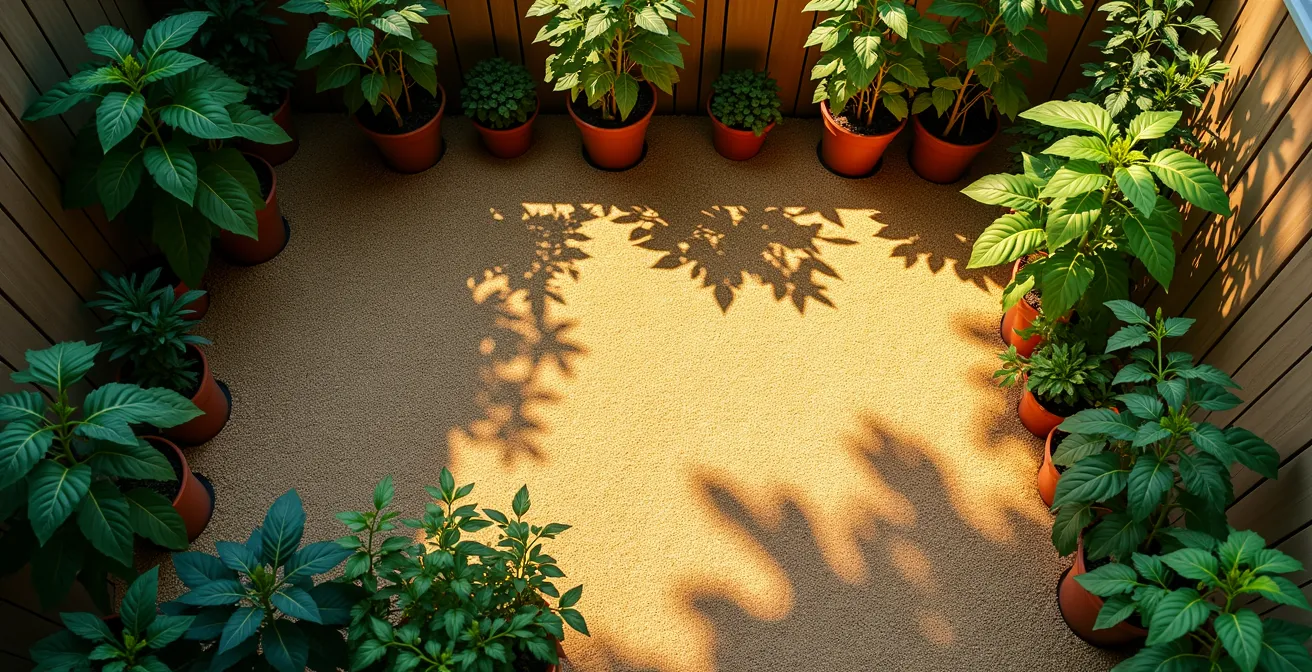
As this map of light zones demonstrates, shadows from a fence, house, or nearby tree create distinct microclimates within a very small area. The success of London-based gardener Mark Ridsdill Smith, who harvested over 80kg of produce from a tiny concrete balcony, was built on this principle. He meticulously mapped his sun patterns and used vertical shelves and strategic placement to ensure every plant received its optimal light budget, moving sun-lovers into the brightest spots and shade-tolerant herbs into the corners. This is the essence of input optimization: matching the plant’s non-negotiable needs with the available resources of your specific plot.
Raised Beds or In-Ground: Which Saves Your Back and Soil?
The structure of your garden bed is a critical decision that directly impacts soil quality, drainage, and planting density. While traditional in-ground gardens are cost-effective to start, they are often limited by the quality of native soil, which can be compacted, clay-heavy, or nutrient-poor. For a high-yield 10m² system, raised beds offer unparalleled control over the growing medium, effectively creating a perfect, custom-built soil environment. This control is a key variable in the yield equation.
As the experts at the Gardener’s Supply Company note in their “Backyard Vegetable Gardening Guide”:
When vegetables are planted intensively in raised beds they shade and cool the ground below and require less watering, less weeding, less mulching — in other words, less drudgery for the gardener.
– Gardener’s Supply Company, Backyard Vegetable Gardening Guide
This efficiency comes from the ability to engineer the perfect soil from scratch—a mix of high-quality compost, topsoil, and aeration agents like perlite or vermiculite. A raised bed guarantees a soil depth of at least 30-45 cm, far more than most native soils offer, allowing for denser root growth. This engineered soil also warms up 2-3 weeks earlier in the spring, extending your growing season and making a second or even third harvest possible. Answering the question of how deep a garden should be, for intensive results, 30cm is the absolute minimum for robust root systems.
While the initial cost is higher, the return on investment is clear when analyzing the factors for yield optimization. Raised beds enable a more aggressive, calculated approach to intensive planting that is difficult to achieve in-ground.
| Factor | Raised Beds | In-Ground |
|---|---|---|
| Soil Depth Control | 18-24 inches guaranteed | Variable, often <12 inches |
| Spring Planting | 2-3 weeks earlier | Wait for soil warming |
| Drainage | Excellent, no compaction | Depends on native soil |
| Intensive Planting | 15% more plants per m² | Standard spacing required |
| Initial Cost | $300-500 for 10m² | $50-100 soil amendment |
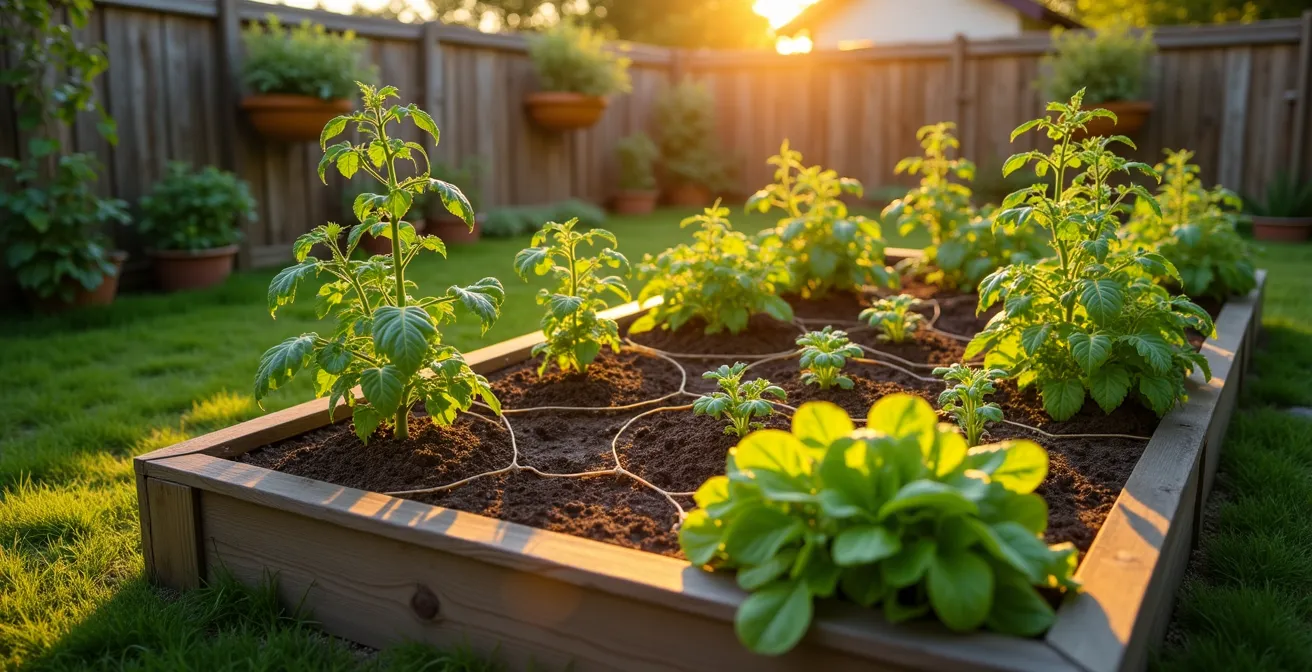
The Spacing Mistake That Invites Fungus into Your Garden
Traditional gardening advice suggests planting in neat rows, a method inherited from large-scale agriculture where machinery access is paramount. In a 10m² bio-intensive garden, this is a colossal waste of space and an open invitation to disease. Planting in a square grid leaves large, unused gaps between rows and creates linear “wind tunnels” that dry out soil, but paradoxically fails to promote healthy air circulation around the base of the plants. This stagnant, humid microclimate at soil level is the perfect breeding ground for fungal pathogens like blight and powdery mildew.
The solution is to abandon the row and adopt spatial geometry. By planting in a hexagonal or triangular offset pattern, you can fit approximately 15% more plants into the same area while simultaneously improving airflow. For example, a 1m x 2m bed that fits 18 plants in a square grid can comfortably hold 21-23 plants in a hexagonal layout. In a 10m² garden, this translates to dozens more plants. In terms of how many tomato plants to grow, proper spacing would allow for roughly 10-12 indeterminate plants in a 10m² area, with each trained vertically.
This method works because it arranges plants at an equidistant spacing from all their neighbors, creating a uniform canopy that shades the soil (suppressing weeds and conserving moisture) while leaving small, crucial air corridors between the stems. Proper pruning of lower leaves further enhances this effect, ensuring that air can circulate freely, dry off morning dew, and prevent fungal spores from taking hold. This is a clear example of how a small change in layout—a simple application of geometry—can produce a dramatic increase in both plant density and plant health.
Implementing this pattern is straightforward:
- Mark your first plant’s position at a corner of the bed.
- Measure the recommended spacing distance for your crop (e.g., 45cm for tomatoes).
- Place the next plant at this distance, but in the next “row,” offset it so it forms a triangle with the first two.
- Continue this offset pattern, creating a honeycomb-like grid across the entire bed.
When to Plant Your Second Crop for a Fall Harvest?
A 10m² garden has a finite area, but its productivity can be multiplied by utilizing the fourth dimension: time. Single-cropping—planting once in spring and harvesting in summer—utilizes only a fraction of your garden’s potential. The key to hitting the 50kg target is temporal sequencing, also known as succession planting. This is the calculated practice of following one harvested crop immediately with another, allowing for two, three, or even four harvests from the same small patch of soil in a single year.
A successful strategy involves pairing fast-maturing spring crops with heat-loving summer crops and cool-tolerant fall crops. For instance, a bed of spring radishes (30 days) and spinach (45 days) can be harvested by early summer, freeing the space for a main crop of bush beans or zucchini. Similarly, after harvesting garlic in mid-summer, the same soil can be immediately replanted with carrots or beets for a late-autumn harvest. This turns every square meter into a continuously producing unit.
However, fall planting requires a specific calculation. As days get shorter and cooler, plants grow more slowly. The “Days to Maturity” listed on a seed packet is based on optimal summer conditions. To account for this, you must use the “Fall Factor.” For any crop you intend to harvest in the autumn, extension research recommends you add 10-14 days to the listed maturity date. To find your planting date, you count backward from your first average frost date, using this adjusted maturity number. This simple calculation prevents the disappointment of an immature crop when the first frost hits.
How to Cut Your Grocery Bill by 20% While Prices Rise?
Beyond the satisfaction of food independence, a high-yield 10m² garden is a powerful economic engine. With grocery prices constantly rising, your small plot can deliver a significant return on investment, effectively paying for itself within the first season. The financial impact is not trivial; recent Garden Pals research indicates an average annual savings of $600 from a garden roughly the size of our 10m² plot (96 square feet). As gardener Anna Chesley reports, the savings can be even more substantial: “Most years, I save more than $1,500 on our yearly grocery bill by growing most of our fresh summer vegetables.”
The key to maximizing your financial return is to focus on high-value crops. Planting vegetables that are expensive to buy but easy to grow delivers the highest ROI. A kilogram of homegrown tomatoes has a much higher grocery value than a kilogram of potatoes. Fresh herbs, gourmet salad greens, and sweet bell peppers are other examples of crops that offer outsized savings. For a suburban homeowner, the easiest high-yield vegetables are often tomatoes, lettuce, and beans, which provide continuous harvests.
By focusing your 10m² plot on these high-ROI crops, you can strategically offset the most expensive items on your grocery list. The following table provides a clear calculation of the potential economic output from a well-managed space, demonstrating that the ROI can often exceed 1000%.
| Vegetable | Yield from 10m² | Grocery Value | Seed Cost | ROI |
|---|---|---|---|---|
| Tomatoes | 15kg | $75 | $6 | 1150% |
| Herbs (mixed) | 2kg | $160 | $12 | 1233% |
| Lettuce | 8kg | $48 | $4 | 1100% |
| Beans | 6kg | $36 | $5 | 620% |
| Peppers | 5kg | $40 | $4 | 900% |
This demonstrates that your garden is not just a hobby; it’s a tangible financial asset that actively works to reduce your household expenses.
Multivitamins or Whole Foods: Which Actually Absorbs Better?
The benefits of a homegrown harvest extend far beyond the financial. The nutritional quality of produce grown in your own backyard is fundamentally superior to its store-bought counterparts. The debate between supplements and whole foods often overlooks a critical factor: nutrient degradation over time. A multivitamin pill offers a standardized dose, but the bioavailability of its synthetic nutrients is often questioned. Conversely, a “fresh” vegetable from the supermarket may have lost a significant portion of its nutritional value during the week-long journey from farm to shelf.
Vitamins, particularly water-soluble ones like Vitamin C and folate, are highly volatile. Studies show their levels in vegetables decline rapidly after harvest. Produce that is picked, shipped, stored, and then sits on a grocery store shelf for days can have drastically lower nutrient content than a vegetable picked at peak ripeness and eaten within the hour. Your 10m² garden gives you direct access to produce at its absolute nutritional peak, retaining up to 90% more of these key vitamins compared to commercial equivalents.
Furthermore, the health of your soil directly translates to the health of your food. A garden enriched with high-quality compost is teeming with microbial life that makes minerals and micronutrients more available to plant roots. These phytonutrients, which play a crucial role in disease prevention, are often found in higher concentrations in vegetables grown in rich, living soil compared to those from large-scale industrial farms where soil can be depleted. Your garden isn’t just growing food; it’s cultivating a more potent, bioavailable, and effective form of preventative medicine than you can buy in a bottle or a store.
Key Takeaways
- Systematic crop rotation is non-negotiable for preventing soil-borne diseases and nutrient depletion.
- Accurate sun mapping is the first step in creating a “light budget” that dictates plant placement and yield potential.
- Intensive planting using hexagonal geometry increases plant density by up to 15% and improves airflow to prevent fungal diseases.
How to Start a Permaculture Guild in Your Backyard?
The final step in optimizing your 10m² garden is to evolve it from a collection of individual plants into a self-supporting ecosystem. This is the core principle of a permaculture guild: a grouping of plants, insects, and animals that work together synergistically. Instead of you providing all the inputs (fertilizer, pest control, water), the guild creates a closed-loop system where the needs of one element are met by the outputs of another. This is the pinnacle of efficiency, reducing labor while increasing resilience and yield.
The most famous example is the “Three Sisters” guild of corn, beans, and squash. The corn provides a natural trellis for the beans to climb. The beans, being legumes, fix atmospheric nitrogen in the soil, fertilizing the heavy-feeding corn. The large, sprawling squash leaves create a living mulch that suppresses weeds, cools the soil, and retains moisture for all three. This polyculture system has been shown to produce a higher combined yield than growing each crop separately.
You can design a similar guild around a central crop like a tomato. By surrounding your tomato plants with specific companions, you create a fortress of mutual support. Basil can help deter tomato hornworms and whiteflies. Borage attracts pollinators, improving fruit set, and its deep taproot “mines” trace minerals from the subsoil, making them available to the tomato when its leaves are used as mulch. Marigolds planted around the border release a biochemical that repels root-knot nematodes, a common tomato pest. This is not folklore; it’s applied ecological science in your backyard.
Action Plan: Building a Tomato Guild in a 1m² Plot
- Central Element: Plant one indeterminate tomato plant and provide a tall, sturdy stake or cage.
- Pest Deterrence: Surround the tomato base with 4-6 basil plants to repel common pests and improve flavor.
- Pollinator & Nutrient Support: Add 2-3 borage plants nearby to attract bees and accumulate minerals.
- Nematode Control: Create a protective border around the 1m² area with 6-8 French Marigold plants.
- Living Mulch: Underplant the entire area with a low-growing legume like white clover to fix nitrogen, suppress weeds, and retain moisture.
Frequently Asked Questions About High-Yield Gardening
Do homegrown vegetables have more nutrients than store-bought?
Yes, vegetables harvested at peak ripeness and consumed immediately contain maximum vitamin content. Commercial produce loses vital nutrients like Vitamin C and folate during the extended time it takes for transport and storage, which can significantly diminish its nutritional value.
Which vegetables provide the most nutritional value per square foot?
Dark leafy greens like kale, chard, and spinach offer the highest concentration of vitamins (A, C, K) and essential minerals like iron and calcium, all while occupying minimal growing space. They are an ideal choice for maximizing nutritional output in a small garden.
How does soil quality affect vegetable nutrition?
Soil quality is paramount. Vegetables grown in compost-enriched, microbially active soil contain demonstrably higher levels of minerals, antioxidants, and phytonutrients compared to those grown in chemically-fertilized or depleted soils. Healthy soil is the foundation of nutritious food.
By following these calculated strategies—from systematic crop rotation and light budgeting to spatial geometry and permaculture guilds—the goal of harvesting 50kg of produce from a 10m² plot transforms from an abstract ambition into a tangible, achievable outcome. This engineering-based approach to gardening not only maximizes your yield but also builds a resilient, self-improving system that provides superior nutrition and significant financial savings year after year. The ultimate yield is not just the food you harvest, but the independence and knowledge you cultivate.