
In summary:
- A permaculture guild is not a static plant list but an actively managed ecosystem designed for self-sufficiency.
- Success depends on engineering your soil and water systems first, using techniques like heavy mulching and contour swales.
- Active management, such as precisely timed “chop and drop” and containing aggressive species, is key to reducing long-term labor.
- Prioritizing native plants and planning for year-round pollinator support creates a resilient system that thrives with minimal intervention.
For many gardeners, the dream of a lush, productive backyard often clashes with the reality of constant weeding, watering, and fertilizing. We’re told to work with nature, yet we find ourselves in an endless battle against it. The concept of a “permaculture guild” promises a way out, often presented as a magic recipe: plant a fruit tree, add some comfrey and clover, and watch a self-sustaining paradise emerge. This is the common understanding, a simple plant-by-numbers approach.
While companion planting is a part of the story, this view misses the core principle. It treats the garden like a static assembly line, ignoring the dynamic, living processes that truly create resilience. The popular “three sisters” guild of corn, beans, and squash is a historical example, but it’s the functional relationships—structure, nitrogen fixation, and ground cover—that make it work, not just the specific plants.
But what if the key to a successful guild wasn’t in the plant list, but in your actions? What if the secret lies not in *what* you plant, but in *how* you orchestrate the ecological processes of your garden? This guide reframes the concept of a guild. It moves beyond static planting charts to focus on the active techniques that transform a simple grouping of plants into a thriving, low-labor, self-sustaining ecosystem. It’s about becoming less of a planter and more of an ecological conductor.
This article will walk you through the foundational actions that create a truly functional guild. We’ll explore how to engineer your soil and water, manage plant energy and growth, and make strategic choices that build resilience from the ground up, empowering you to create a garden that works for you, not the other way around.
Summary: Creating Your First Permaculture Guild
- Why Mulching Is the Single Most Important Step in Permaculture?
- How to Build Swales to Water Your Trees Without a Hose?
- Annual Veggies or Food Forests: Which requires Less Labor?
- The Mistake of Planting Mint or Bamboo Without Containment
- When to Chop and Drop Your Cover Crops for Max Nitrogen?
- How to ‘Read’ Your Land to Choose the Right Guild Strategy?
- Why Native Plants Survive Heat Waves Better Than Imports?
- How to Turn Your Lawn Into a Pollinator Paradise?
Why Mulching Is the Single Most Important Step in Permaculture?
Before planting a single seed for your guild, the first act of system orchestration begins with the soil surface. Mulching isn’t just about making a garden look tidy; it’s the single most powerful technique for kickstarting the ecological processes that define a healthy ecosystem. It is the foundational act of soil engineering. By covering bare soil with organic matter like wood chips, straw, or leaves, you are replicating the natural forest floor, a system perfected over millennia.
The benefits are immediate and profound. A thick layer of mulch acts as a sponge, drastically reducing water evaporation and protecting soil life from the sun’s harsh rays. It suppresses the germination of annual weeds, cutting down on future labor. As it decomposes, it provides a slow-release fertilizer, feeding the vast web of microorganisms, fungi, and earthworms that build soil structure and make nutrients available to your plants. In fact, research shows that organic mulching increases the available water capacity of soil by 18-35%, creating a vital buffer during dry periods.
Instead of just importing mulch, you can design your guild to create its own. This is where the concept of “living mulch” and “chop and drop” plants comes into play, creating a self-mulching system that builds fertility in place. The Sherret Food Forest in Portland, Oregon, serves as a prime example, where established guilds generate all their own mulch, creating a closed-loop system that requires minimal external inputs after the first few years.
How to Build Swales to Water Your Trees Without a Hose?
Once you’ve addressed the soil surface with mulch, the next level of ecological design involves shaping the land itself to manage water. A swale is a simple but brilliant earthwork: a shallow trench dug on contour, with the excavated soil piled on the downhill side to form a raised mound, or berm. It is a passive rainwater harvesting system designed to stop, spread, and sink water across the landscape, hydrating your guild long after the rain has stopped.
When it rains, water that would normally run off the surface, taking precious topsoil with it, is caught in the swale. It then slowly infiltrates deep into the soil, creating a massive underground lens of moisture. Trees and other deep-rooted plants planted on the berm can access this stored water for weeks or even months. This technique is a cornerstone of creating a drought-resilient garden and moving away from dependance on irrigation. It’s the difference between a garden that needs constant life support and one that has its own internal circulatory system. Studies show that swales combined with mulch enhance moisture retention in the 30-80cm soil layer, where tree roots are most active.
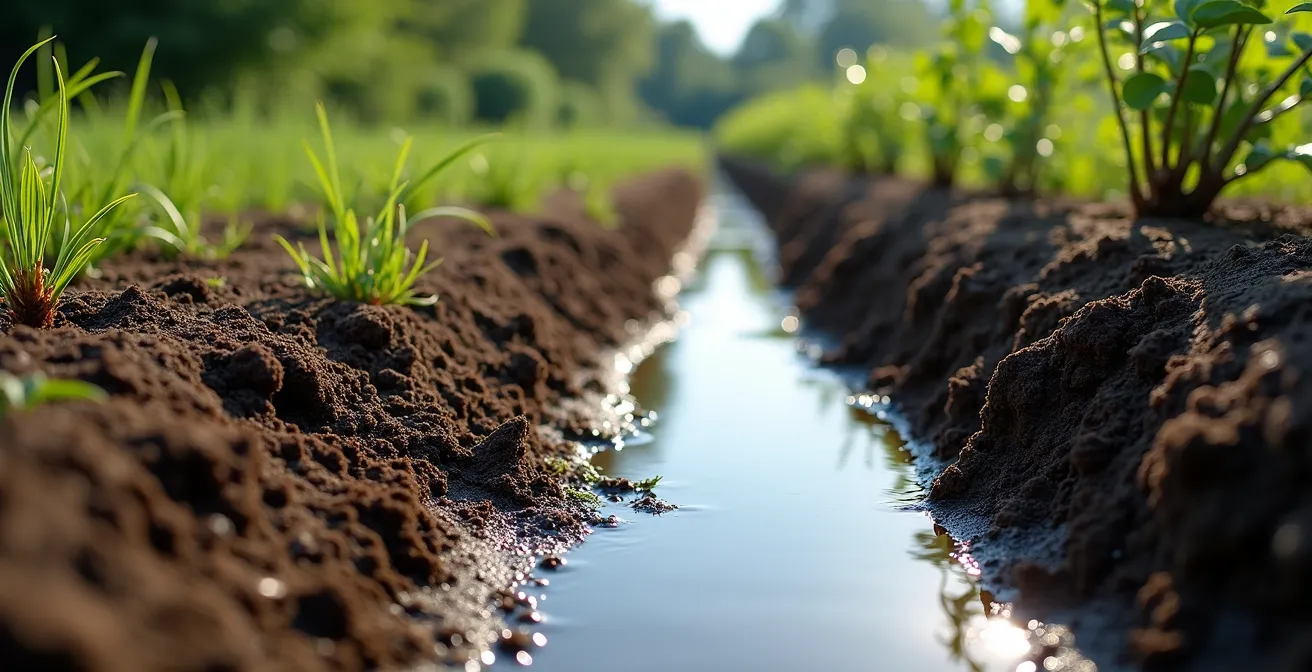
As the illustration shows, the swale acts as a temporary reservoir, forcing water to soak into the ground rather than escape. This deep soil moisture is the key to establishing a food forest or tree guild that can survive and even thrive through summer heat waves without you ever having to pull out a hose. It’s a one-time investment in earthworks that pays dividends in water and resilience for decades.
Annual Veggies or Food Forests: Which requires Less Labor?
A common question for gardeners is where to invest their energy. The familiar rhythm of the annual vegetable garden—tilling, planting, weeding, and repeating—is labor-intensive every single year. A permaculture guild, designed as a perennial food forest, operates on a different timeline. It requires a significant upfront investment of labor but promises dramatically reduced work in the long run.
The initial phase of establishing a guild is demanding. It involves site analysis, earthworks like swales, soil building, and planting a multi-layered system of trees, shrubs, and groundcovers. This “Year 1” effort is often more intensive than starting a simple vegetable patch. However, once the system begins to mature, the ecological processes take over. The groundcovers suppress weeds, the “chop and drop” plants provide mulch and fertilizer, and the deep-rooted perennials require far less watering. As documented by Midwest Permaculture, a well-designed guild can see a 60% labor reduction after its third year, as the system begins to manage itself.
This long-term return on investment is the core value proposition of a perennial guild. It’s a shift from a yearly cycle of high-intensity work to a system that grows in abundance and stability over time with decreasing effort. The following table illustrates this labor investment curve.
A comparative analysis of labor investment shows a clear long-term advantage for perennial systems.
| System Type | Year 1 Labor | Years 2-3 | Years 4+ | Total 10-Year Hours |
|---|---|---|---|---|
| Annual Vegetables | 80 hrs/100sqm | 80 hrs/year | 80 hrs/year | 800 hours |
| Perennial Guild | 120 hrs/100sqm | 40 hrs/year | 20 hrs/year | 340 hours |
| Hybrid System | 100 hrs/100sqm | 50 hrs/year | 30 hrs/year | 440 hours |
The Mistake of Planting Mint or Bamboo Without Containment
Orchestrating a guild isn’t just about encouraging growth; it’s also about managing it. Some of the most useful plants in permaculture are also the most aggressive. Vigorous spreaders like mint, comfrey, lemon balm, and running bamboo can be invaluable for their roles as groundcovers, biomass producers, or pest repellents. However, planted without a plan, they can quickly overrun a garden, outcompeting other guild members and turning a balanced ecosystem into a monoculture.
This is a classic rookie mistake born from focusing only on a plant’s benefits without considering its behavior. A permaculture designer thinks in four dimensions, with time being the fourth. They anticipate a plant’s future growth and plan accordingly. Rather than avoiding these powerful plants, the solution is to use intelligent containment strategies. This doesn’t always mean a plastic root barrier. Ecological containment can be achieved by using the landscape and other plants to control growth.
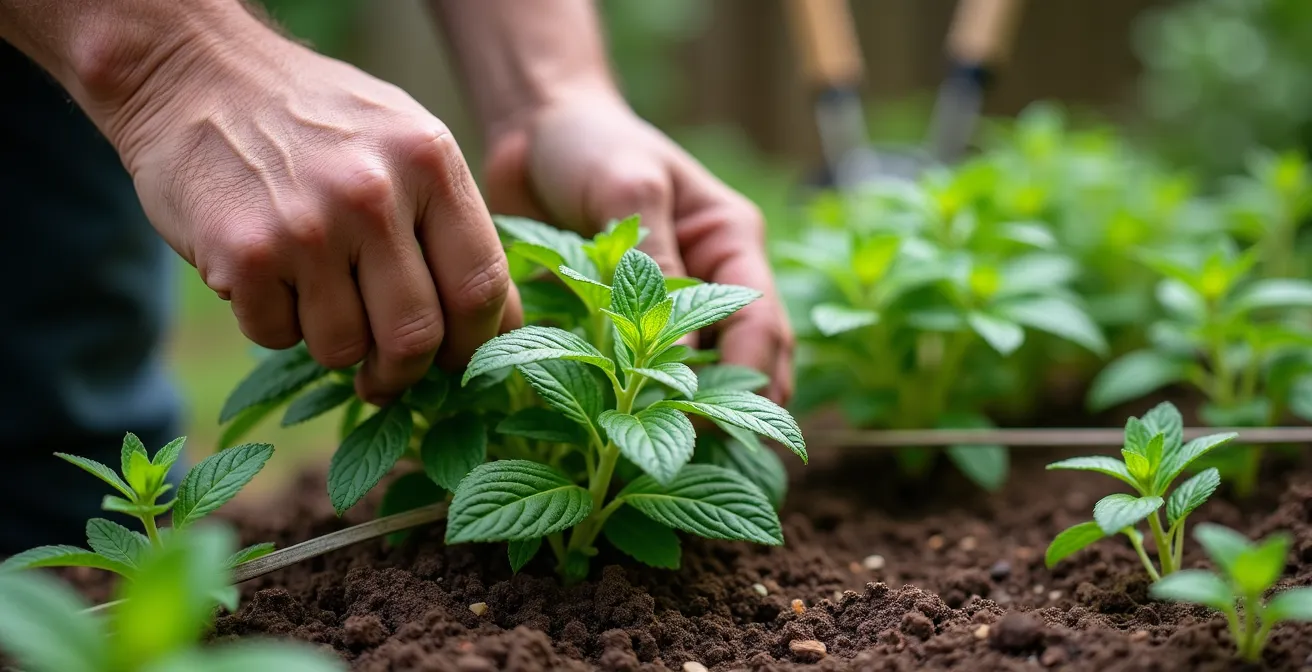
The goal is to channel the plant’s energy where it’s wanted. This could involve planting mint in a pot sunk into the ground, surrounding a bamboo patch with a regularly mown “moat” where any escaping runners are cut down, or placing vigorous groundcovers where their spread is desirable, such as on a steep, eroding bank. This active management is the essence of system orchestration—using a plant’s aggressive nature as a feature, not a bug.
Action Plan: Ecological Containment for Aggressive Spreaders
- Install underground root barriers at least 60cm deep, ensuring they protrude 10cm above the soil to block spreading rhizomes.
- Create a “moat” of regularly mown grass at least 1 meter wide around the patch; the constant cutting depletes the energy of escaping runners.
- Plant aggressive spreaders in areas with heavy shade from established tree canopies, as the lack of sun will naturally limit their vigor.
- Utilize root competition by planting vigorous species like mint near established, water-hungry trees like willows, whose dense root systems will outcompete them.
- Designate specific “biomass production zones” where spreading is actively desired, allowing you to harvest the excess growth for mulch or compost.
When to Chop and Drop Your Cover Crops for Max Nitrogen?
One of the most dynamic processes in a permaculture guild is the “chop and drop” technique. This involves growing specific plants, often nitrogen-fixers (like clover, vetch) or dynamic accumulators (like comfrey, borage), and then cutting them down to let them decompose in place as mulch. This practice is the engine of a self-fertilizing system, but its effectiveness hinges almost entirely on one factor: timing.
If you chop too early, the plant hasn’t accumulated enough biomass and nutrients to make a significant impact. If you chop too late, after the plant has set seed, it will have used most of its stored nitrogen to produce those seeds, leaving little for the soil. The goal is to cut the plant at its peak of vegetative growth, just as it begins to flower. At this stage, the leaves and stems are loaded with nutrients, particularly nitrogen, which are then made available to neighboring plants as they decompose.
This isn’t a random act of weeding; it’s a precisely timed nutrient transfer. Research indicates that properly timed chop-and-drop provides peak nitrogen release into the soil about two to three weeks after cutting, perfectly timed to feed a growing fruit tree or hungry vegetable. Learning to read the visual cues of your plants is a key skill for the ecological gardener, allowing you to orchestrate the flow of nutrients within your guild.
Checklist: Visual Cues for Optimal Chop and Drop
- Vetch: Chop when approximately 50% of the plants display their first purple flowers, but before any seed pods have formed.
- Crimson Clover: Cut when the flower heads are a vibrant, bright red but still feel soft to the touch, before they begin to dry out.
- Fava Beans: Harvest the plant material when the bottom-most pods are just starting to swell, while the main stems remain green and succulent.
- Comfrey: Perform the first cut when the largest leaves reach a height of 18-24 inches, well before the main flowering stalks appear.
- Buckwheat: Chop when the crop is in full bloom, covered with white flowers, to maximize biomass and attract the highest number of pollinators before it sets seed.
How to ‘Read’ Your Land to Choose the Right Guild Strategy?
Before you dig a single swale or plant a single tree, the most critical permaculture principle is to observe. A guild that thrives in one backyard might fail in another, not because the plants are wrong, but because the design ignored the specific conditions of the site. “Reading” your land is the process of systematic observation to understand the natural flows of sun, wind, water, and energy. It is the strategic phase of your work as a system orchestrator.
This process involves more than a casual glance. It means mapping the sun’s path across your yard throughout the day and year to identify full-sun and shady microclimates. It means observing where water flows and puddles during a heavy rain to find the natural contours for a swale. It means feeling the direction of the prevailing summer and winter winds to plan for windbreaks or, conversely, cooling breezes. This deep observation allows you to work with the forces of your site, not against them.
By understanding these patterns, you can make informed decisions. A hot, dry, south-facing slope calls for a guild of drought-tolerant, deep-rooted native plants. A low-lying, boggy area might be perfect for a guild centered around elderberry and other water-loving species. This observation phase isn’t a delay; it is the most valuable work you can do, ensuring your design is tailored, resilient, and effective from day one. An audit of your site is the essential first step.
Your Site Audit Checklist: 5 Points to Verify
- Sun Mapping: Sketch your yard and track the path of the sun. Mark areas of full sun (6+ hours), partial sun, and full shade at different times of the year (summer vs. winter).
- Water Flow: During a rainstorm, observe and note where water flows, where it pools, and where it runs off quickly. These are your key points for placing swales or rain gardens.
- Wind Sectors: Identify the direction of prevailing winter winds (for windbreak placement) and summer breezes (to channel for cooling). Tie ribbons to stakes to make this visible.
- Existing Biology: Inventory what’s already growing successfully, including “weeds.” These indicator plants tell you about your soil’s pH, compaction, and fertility. Note areas with high insect or bird activity.
- Zone Analysis: Divide your property into zones based on frequency of use. Zone 1 is closest to the house (herbs, salad greens), while Zone 5 is a wild area you rarely visit. Place your guild accordingly.
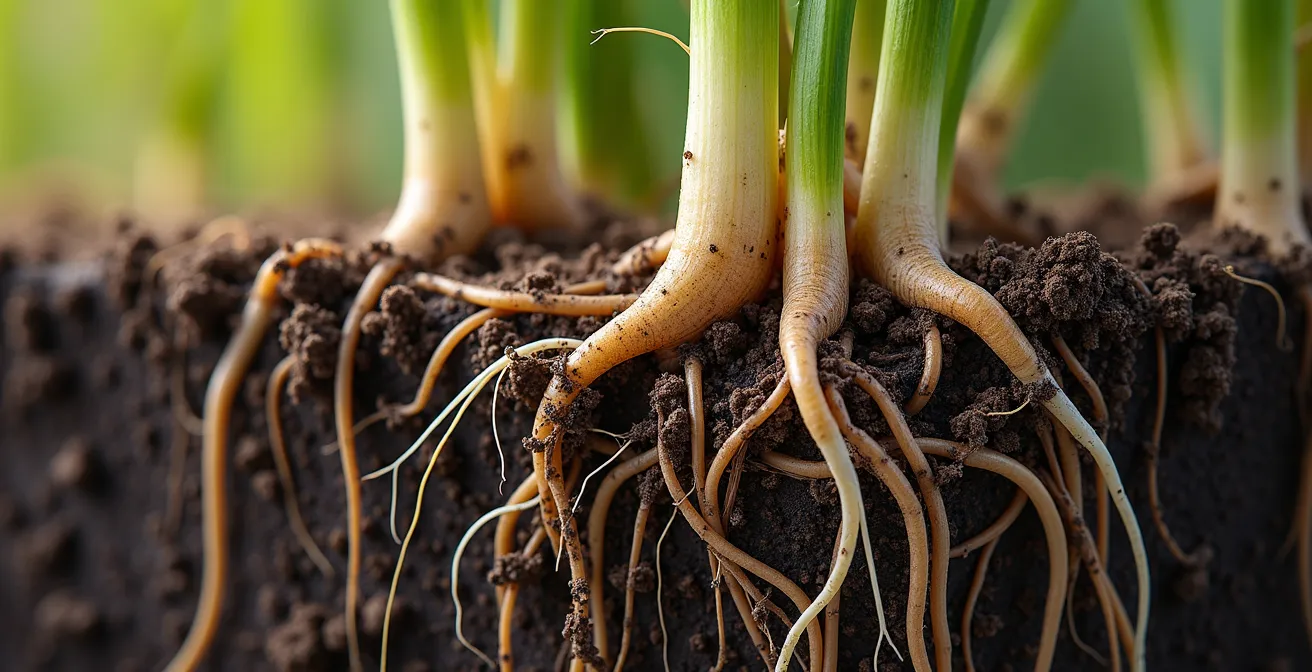
Why Native Plants Survive Heat Waves Better Than Imports?
The choice of plants is a crucial part of guild design, and the “right plant, right place” mantra is paramount. While exotic plants can be beautiful and productive, prioritizing species native to your region is a core strategy for building a resilient, low-maintenance guild. Native plants have spent thousands of years co-evolving with your local climate, soil, and wildlife. This gives them a profound home-field advantage.
This advantage is most obvious during extreme weather. Native species have developed deep and extensive root systems to access moisture far below the surface, allowing them to withstand drought. Their foliage is adapted to the local sun intensity, and their life cycles are timed to the local seasons. Recent drought studies demonstrate that native species show 28-58% better water retention in their tissues compared to many non-native ornamentals. Using natives as the “framework” for your guild reduces irrigation needs by up to 40%.
Furthermore, this local adaptation extends to the entire ecosystem. Native plants provide the specific food and habitat required by local pollinators, beneficial insects, and birds. These creatures, in turn, provide essential services like pollination and pest control for your guild. Building a guild with a strong matrix of native plants doesn’t just create a garden; it restores a piece of a functional local ecosystem, supporting 3 times more beneficial insects than a garden of purely non-native plants. This web of relationships is what creates true, long-term resilience.
Key Takeaways
- A permaculture guild is an active system, not a static plant list; success lies in orchestrating ecological processes.
- Start by engineering the foundation: use heavy mulching to build soil life and contour swales to harvest every drop of rainwater.
- Long-term success relies on embracing dynamic management, like precisely timed “chop and drop” for fertility and intelligent containment of vigorous plants.
How to Turn Your Lawn Into a Pollinator Paradise?
A successful permaculture guild does not exist in isolation. It is an open system, deeply interconnected with the wider environment, and its most critical partners are pollinators. Without bees, butterflies, hoverflies, and other insects, your fruit trees won’t set fruit and many of your vegetables won’t produce. Transforming parts of your property, especially the sterile monoculture of a lawn, into a pollinator haven is not just an aesthetic choice; it’s a vital functional upgrade for your entire garden ecosystem.
The key to creating a true paradise is to think beyond a single patch of summer flowers. Pollinators need a reliable food source throughout the entire season, from the first warm days of late winter to the last days of fall. This requires a strategy of bloom succession, intentionally planting a variety of species that will flower in overlapping waves. This ensures that there is always something on the menu, supporting a larger and more diverse population of beneficial insects.
By layering blooming times, you provide a continuous nectar and pollen flow. Early bulbs like crocus feed the first emerging queen bees. The flowering understory of a fruit tree guild supports pollinators during a critical spring window. Summer-blooming herbs and perennials keep them active through the heat, and late-season asters and goldenrod provide the final crucial fuel before winter. Leaving seed heads standing also provides shelter and food for birds and insects over the cold months. This active planning turns your yard into a reliable ecological hub.
Your Guide to Year-Round Bloom Succession Planning
- Early Spring (Feb-Mar): Plant bulbs like crocus, snowdrops, and winter aconite in the fall to provide the earliest possible nectar source.
- Spring (Apr-May): Establish an understory for your fruit trees with early bloomers such as violets, creeping phlox, and ajuga.
- Early Summer (Jun-Jul): Add drought-tolerant perennials like lavender, catmint, and echinacea (coneflower) along the sunny edges of your guild.
- Late Summer (Aug-Sep): Include tall, structural plants like Joe Pye weed, goldenrod, and native asters that provide abundant late-season resources.
- Fall (Oct-Nov): Plant hardy sedum varieties and late-blooming asters. Critically, leave the seed heads of coneflowers and grasses standing for winter food and habitat.
Start today by observing the patterns of your own backyard. Map the sun, watch the water, and identify what’s already there. This initial step of active observation is the beginning of your journey from a simple gardener to a true ecological conductor, ready to create a resilient and abundant ecosystem that will reward you for years to come.